Zenrock Chain Guide
This page will guide you through zenrock chain from creating a workspace to creating a key from the keyrings. Make sure you have completed the setup steps before proceeding and that you are on this URL: https://gardia.zenrocklabs.io/onboard/get-started.
1. Fund your Wallet with ROCK
Once your wallet is successfully connected, you will be redirected to a welcome page that contain some tasks for you to make sure you are setup correctly. When first accessing the frontend with an empty wallet, you will immediately be prompted to request some ROCK tokens from the faucet. Check out our Discord Server to access the faucet (channel zenFaucet-Gardia) to request testnet tokens. After successfully passing the verification, go to the zenFaucet-Gardia channel and follow the pinned instructions to request your ROCK.
ROCK is the native token of zrChain and is required for gas fees, governance and keyring fees.
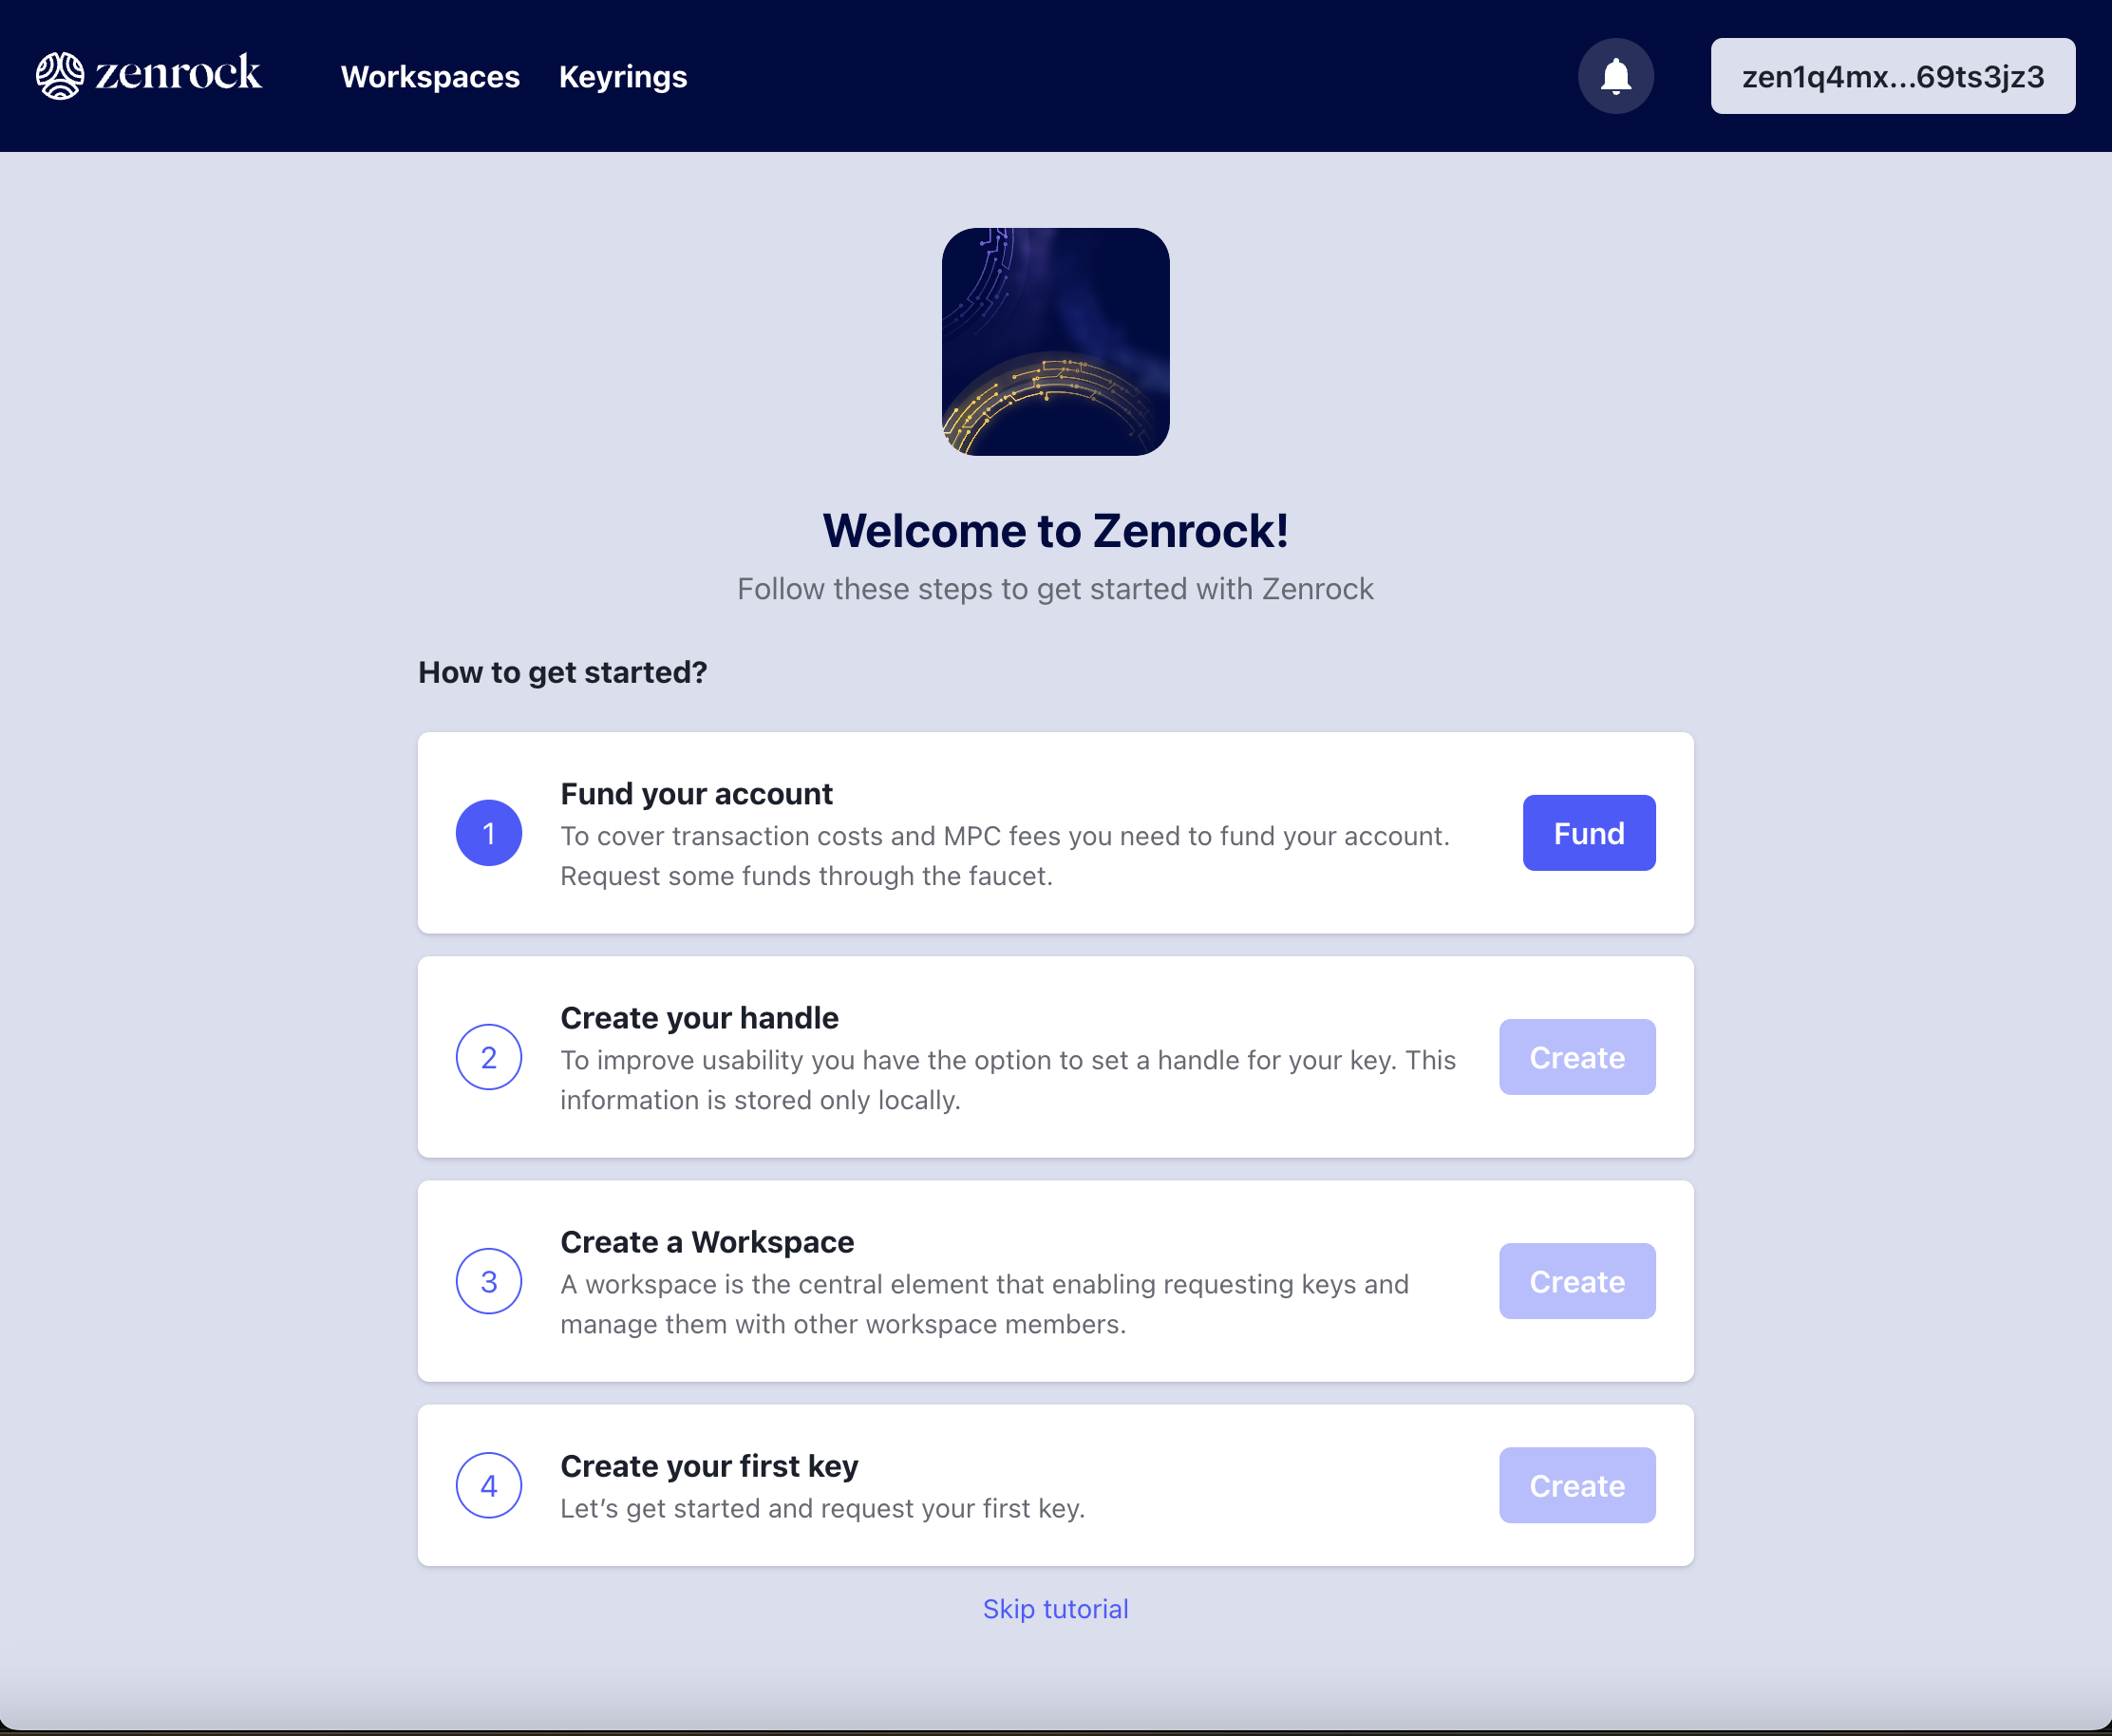
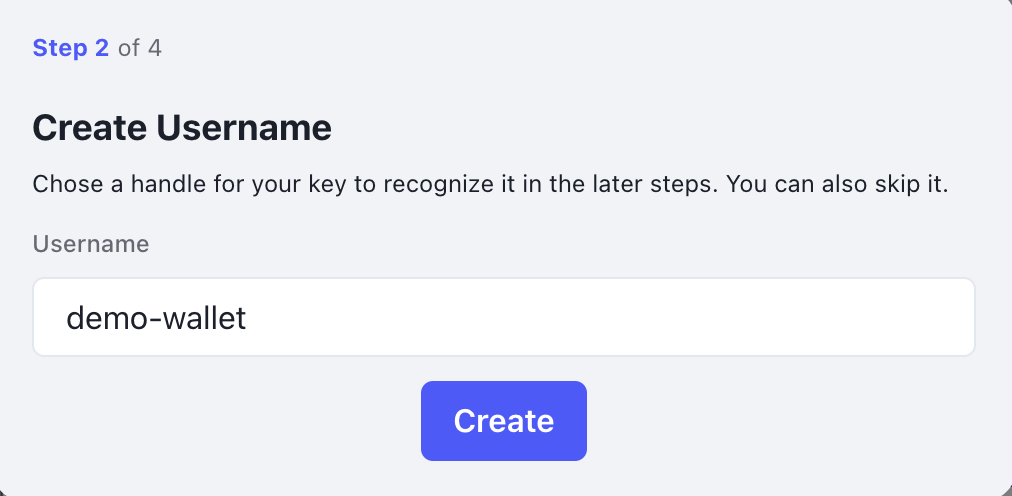
2. Create a Username
To make the user experience more intuitive and personalized, we have implemented a username system which is tied to your key from your wallet. You can set your username on the next prompt. The username will not be stored on-chain won't be exposed to anyone but you on the web application.
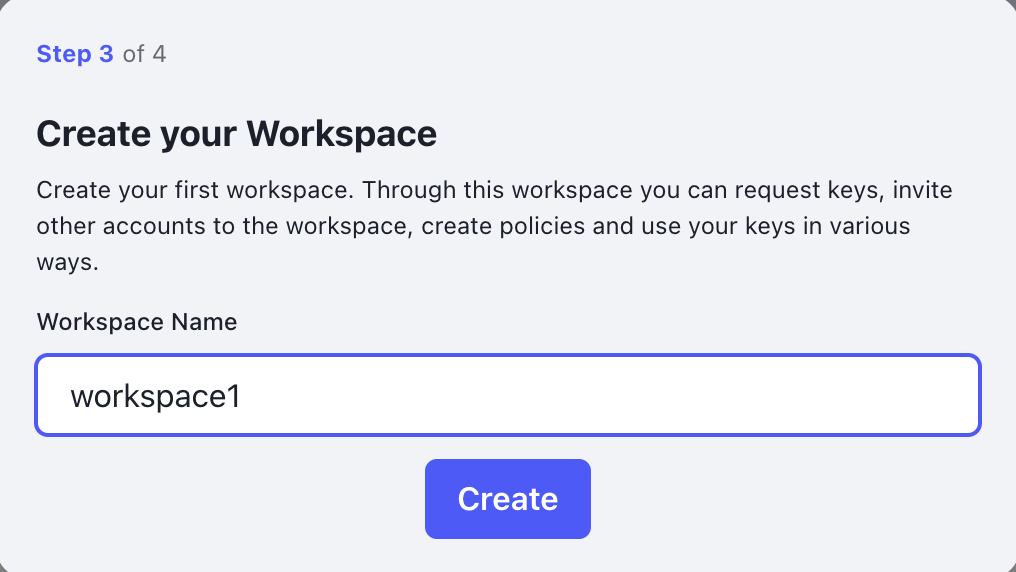
3. Create a Workspace
After funding your account from the faucet, it’s time to interact with zrChain. The guide will prompt a create workspace prompt right after you created a username. Click on the button to create your first workspace if you don’t already have one. Sign the transaction request prompted by Keplr.
This workspace will allow you to request keys from the keyrings.
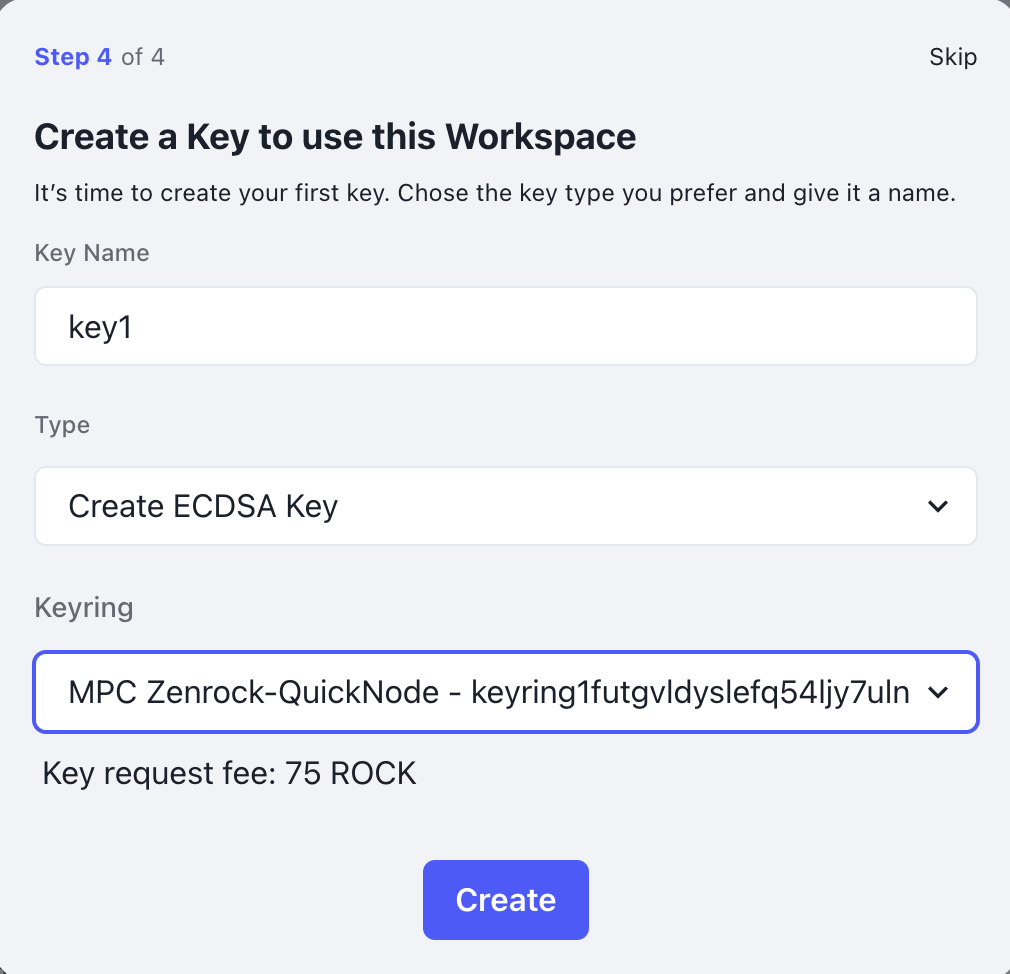
4. Your First Key Request
Now it’s time to create your first key. After creating a workspace, a prompt appears that lets you create your first key. You are able to give it a name that helps you identify it later. You can choose between different key types, in this case we are using an ECDSA key, which is the standard key type for EVM and Cosmos chains. Select a keyring from the dropdown menu and click on Create to submit the key request. Approve the transaction and wait for a moment for the MPC to create the key and publish the public key on-chain.
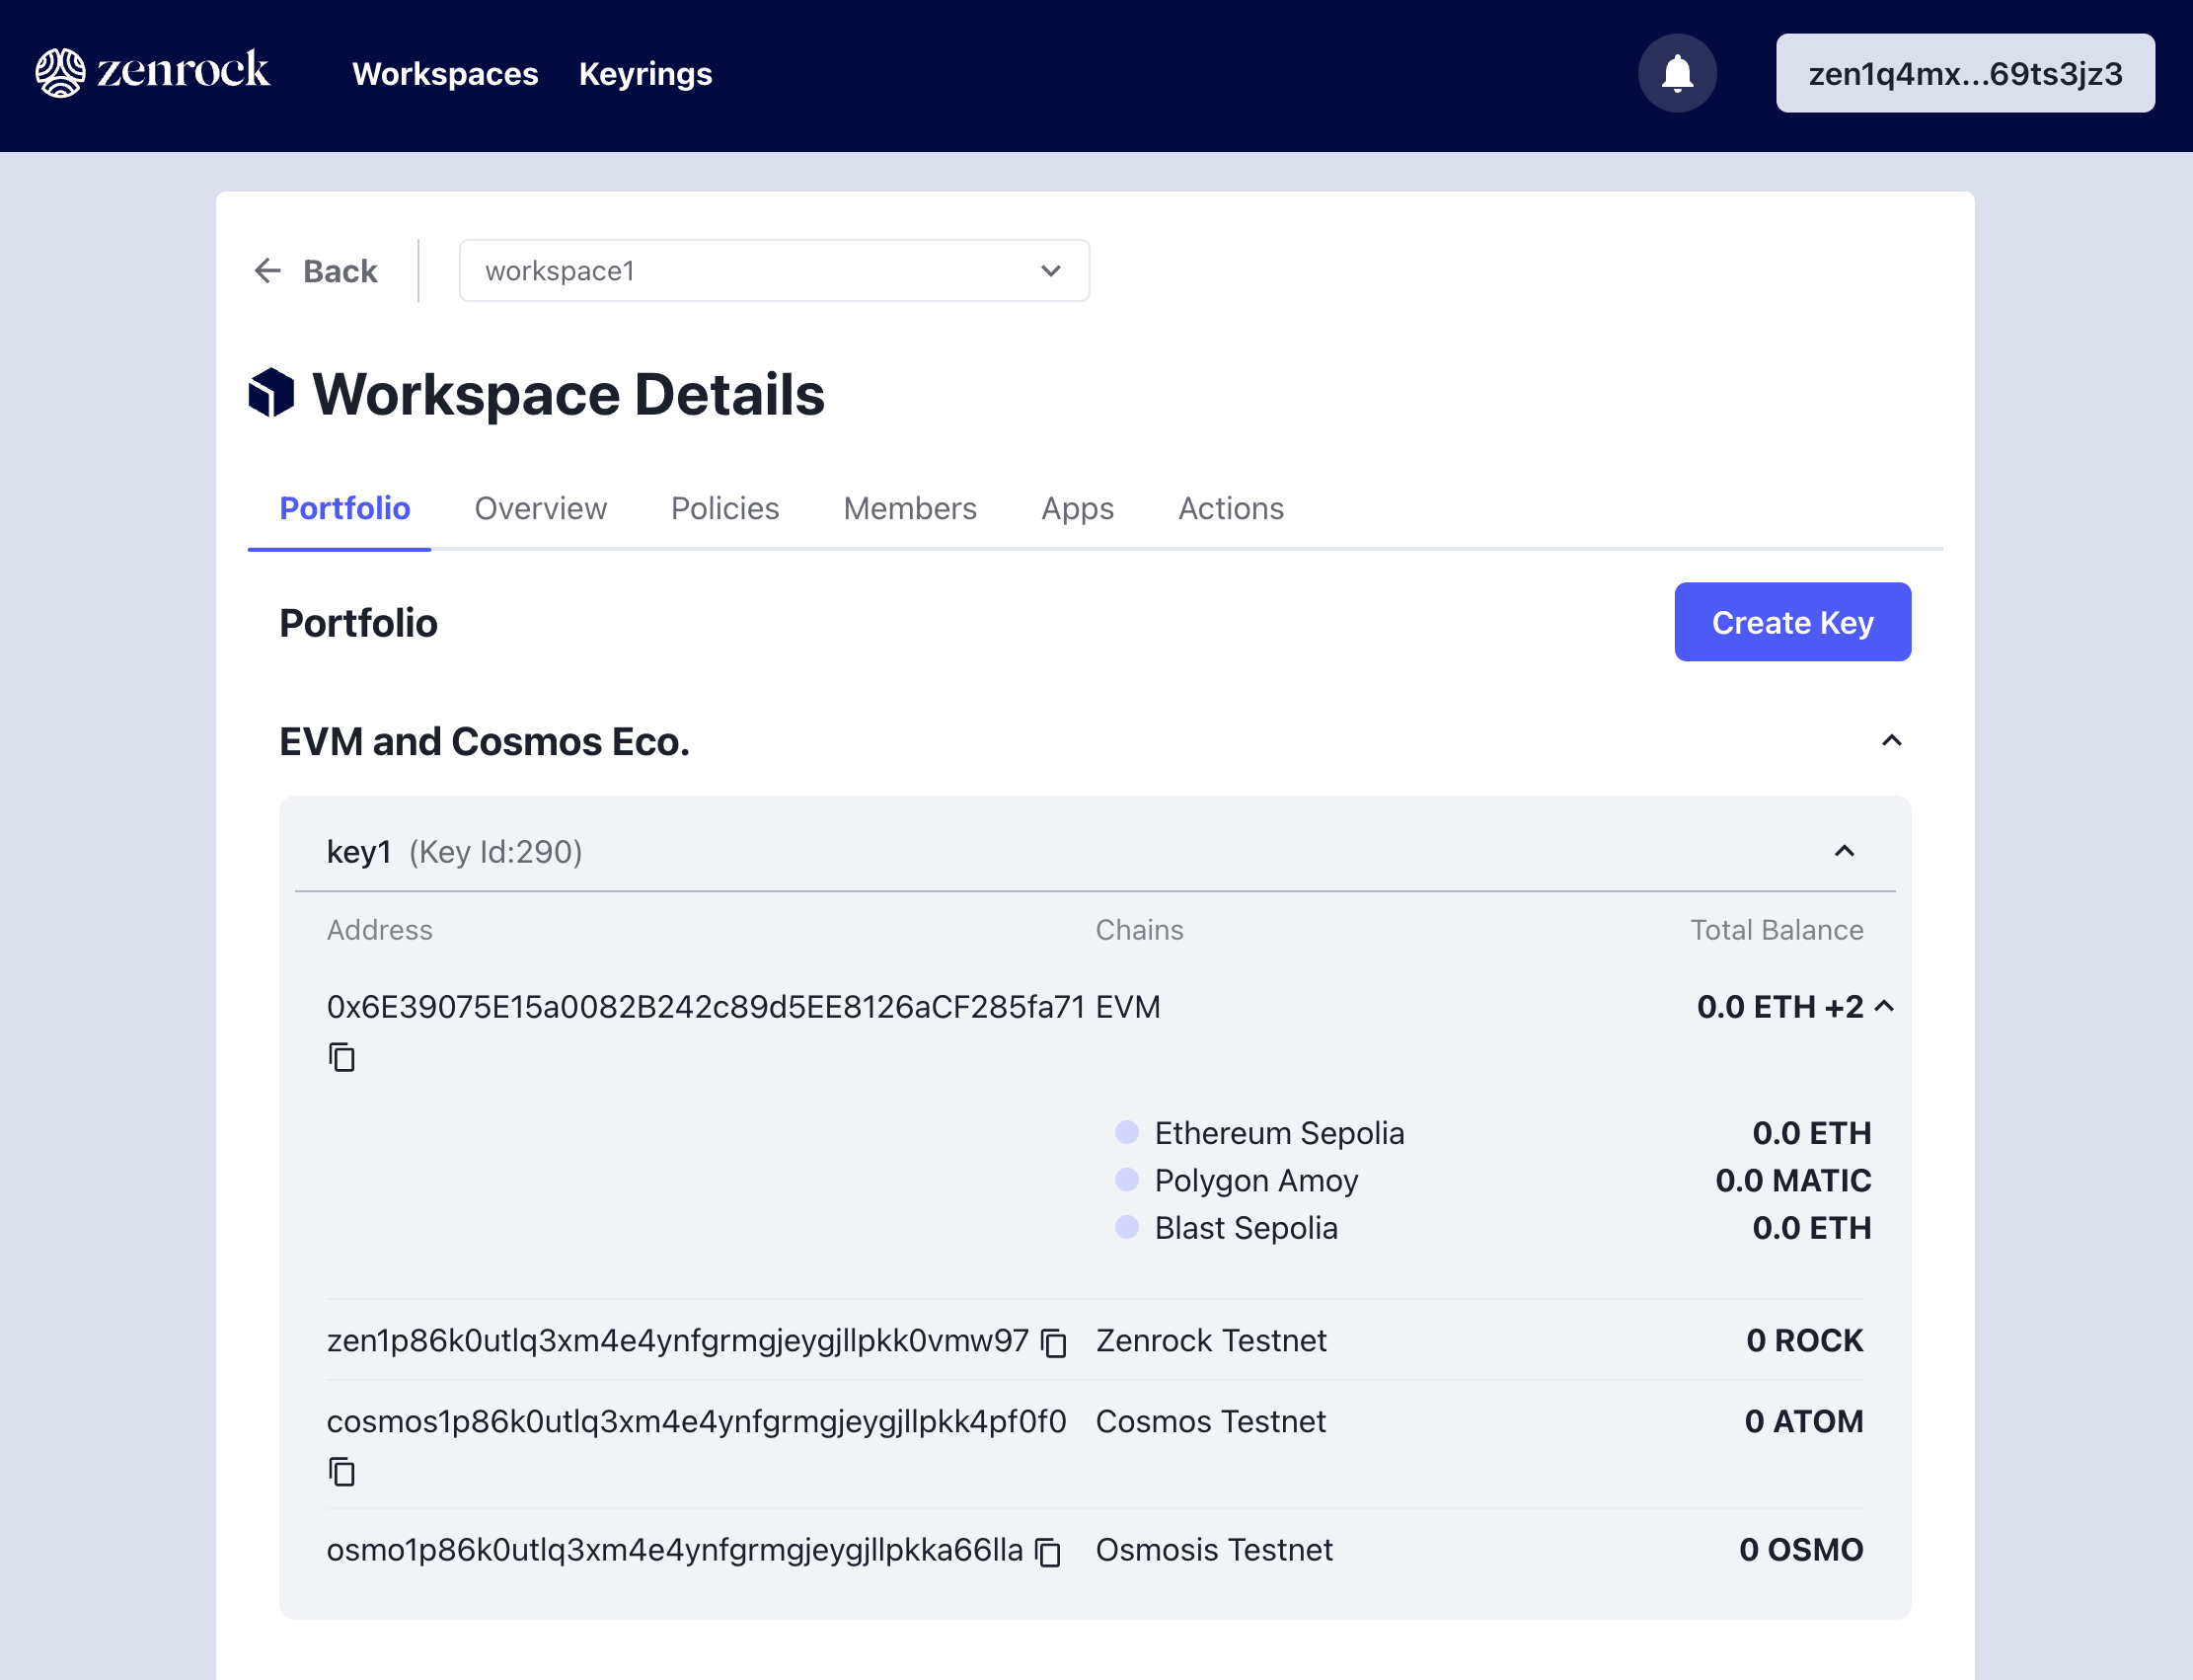
4. Check your workspaces
If not redirected after clicking on finish go to your workspace overview to see the workspace that you just created and see it also has a key listed in it.
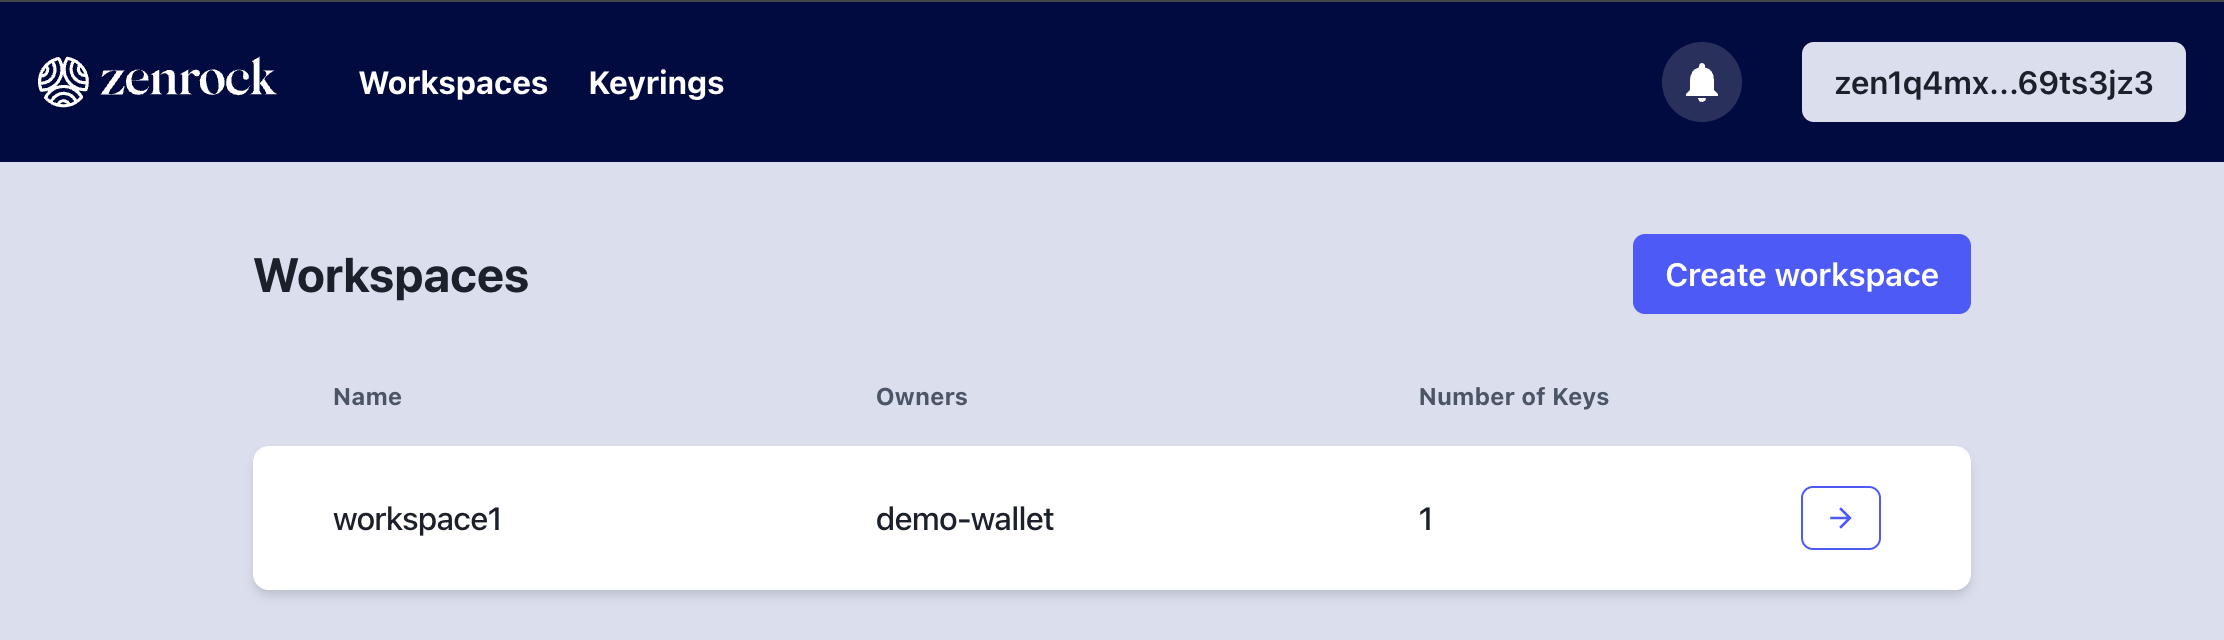
Click on the workspace to open it and see the key that you just created. You can also the the derived addresses for the key and their balance.